

A structured, well-paced training plan can turn a beginner into a confident nail technician within just one to two weeks. This guide outlines a focused day-by-day progression, with special emphasis on ombré techniques, proper product handling, and soft skill development — the essentials for success in any modern nail salon.
1. Essential Mindset for Trainees
Before trainees can create beautiful overlays, they need to understand how the product behaves — including differences between formulas like Flexibuild and Strongbuild, gel consistency, and setting times. Rushing into full set applications without this understanding leads to poor technique and long-term frustration.
New technicians must first master small bead control. This means knowing how to control the amount of liquid absorbed, understanding bead consistency, and developing a feel for the perfect moment to place the bead on the nail. Only once these foundations are in place can ombré work be introduced.
2. Days 1–2: Mastering Powder Pick-Up and Bead Placement
Learning to Pick Up Beads:
- Dip the brush into monomer until it is about 70–80% saturated.
- Lightly tap into the powder, allowing it to absorb naturally — avoid stirring or scraping.
- Wait until the bead has a light wet shine — the surface should look moist but not gritty — then lift it.
Learning to Place Beads:
- Do not drag or press the bead harshly.
- Gently place the bead on the nail and allow it to spread naturally.
- Practise placing small beads side by side, prioritising even control rather than speed.
3. Days 3–4: Working with Larger Beads — Half Nail Coverage
As trainees grow confident with smaller beads, they can begin using slightly larger beads that cover one-third to half of the nail.
- Place the bead in the centre of the nail.
- Use the belly of the brush to gently guide the bead outwards, avoiding direct pressure from the tip.
- Begin rough shaping with a file to familiarise with form correction.
The goal at this stage is to achieve a reasonably smooth surface — free of deep dents, uneven thickness, or bulges.
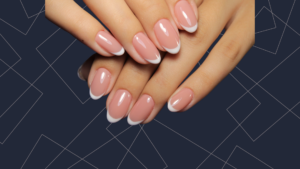
4. Days 5–6: Learning Basic Ombré Techniques
Creating the Ombré Base:
- Start with a nude-toned bead placed near the cuticle area.
- Lightly feather the product out towards both sidewalls.
- Pull the front edge of the bead gently towards the centre of the nail to create a gradient effect.
Adding White or Light Colour at the Tip:
- Apply a small bead of white or pastel at the free edge.
- Using the brush tip, gently push from the tip toward the centre, overlapping slightly with the nude base.
Blending the Fade:
- Use a dry brush to softly blend the area where the two colours meet.
- If a harsh line appears, dip the brush very lightly in monomer and re-blend gently.
5. Days 7–8: Full Ombré Set – Application, Shaping, Finishing
Full Set Practice:
- Apply two beads per nail: one for the nude base, one for the white tip.
- Blend to create a seamless ombré effect.
Shaping and Refinement:
- File both sidewalls to create straight edges.
- Refine the apex or G-point to ensure strength and balance.
Buffing and Topcoat:
- Use a fine buffer to smooth the surface without thinning the structure.
- Apply top coat with care, making sure to seal the free edge fully.
Time Management:
- Set a practice target of 2.5–3 hours per full set initially.
- By the end of week two, aim to complete a full ombré set within 2 hours.
6. Supporting Soft Skills for Nail Technicians
Great nails are only part of the job — professionalism and communication matter too.
- Maintain clean hands and a tidy workstation at all times.
- Communicate clearly but concisely with clients. For instance, say:
“I’m blending the colour to make it smoother and more elegant” rather than lengthy technical explanations. - Encourage self-checking habits after each service:
- Check both sidewalls for symmetry.
- Run a fingertip gently across the nail surface to test smoothness.
🔥 Common Mistakes to Avoid
| Mistake | Result |
|---|---|
| Beads too dry | Beads do not spread naturally, surface cracks easily |
| Beads too wet | Beads run or lose shape |
| Pressing beads too hard | Harsh lines appear in ombré transitions |
| Poor blending | Fade looks broken, unnatural |
| Sloppy shaping | G-point is lost, nail becomes structurally weak |
📝 Additional Notes
- Focus on building strong and consistent overlays before rushing for speed.
- Aim to practise 2–3 hours daily for best results.
- Record training sessions to review technique and track progress.
- Strive to complete at least 5–7 full ombré sets during the first two weeks to develop hand control and rhythm.
By following this roadmap, new technicians can build a solid foundation, progress with confidence, and create salon-quality ombré nails in just a few weeks. Structured training not only shortens the learning curve — it also builds trust, consistency, and pride in the work they do.






Add comment